

Following the launch of the Lead Center in March 2023, Afternic has made two significant updates to its product offering. Landing page selection and ownership verification.
Choosing a landing page
For Afternic sellers, this is one of the most important updates the company has released.
In short, if you Requested price, Buy Now (BIN)and cash parking lot To create a landing page, you need to update the new Sales Lander settings within the Afternic portfolio dashboard.
how this works
In moving to a landing page selection system, Afternic’s team backfilled landing page settings based on nameserver settings. This will be reflected in a new column named “Sales Lander” in your Afternic account.

This eliminates the need to change nameservers to change the landing page of your domain name. Going forward, customers already using Afternic nameservers will be able to update their landing page settings individually or in bulk using Afternic’s Portfolio dashboard.
To update domain names individually, you can switch between Buy It Now (BIN), Request Price, and Cashparking landing pages using the Sales Lander column in the image above. Any changes to this column will be reflected in the quick change of domain name landing page.
Landing page changes can also be done in bulk in two separate ways.
Method 1
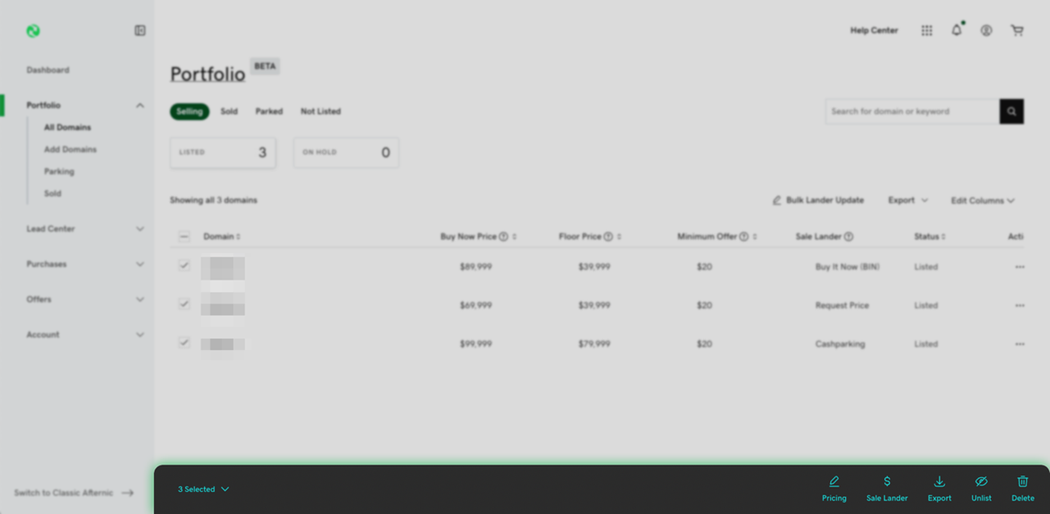
Afternic’s toolbar appears at the bottom of the screen when you select a domain name using the checkboxes on the screen.
From here, you can select the “Sales Lander” option.
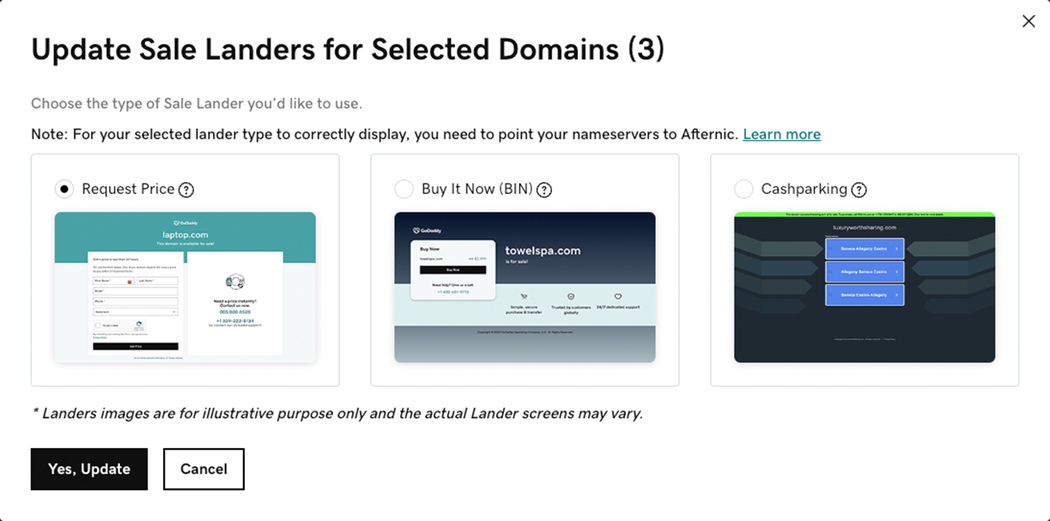
When you see this popup, you can toggle between the 3 currently available landing page options.
Method 2
The second method is best for customers who want to update hundreds of domain landing pages at once.
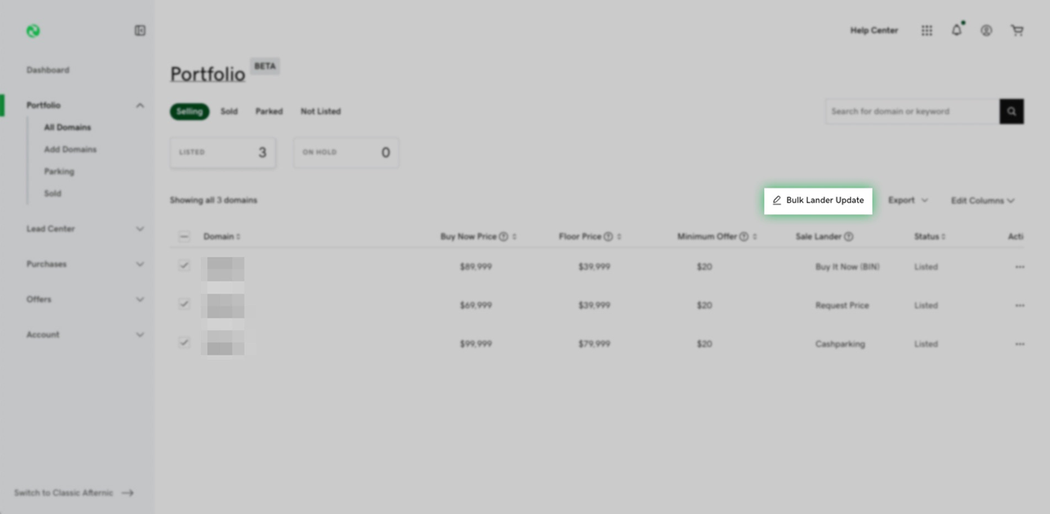
Afternic Portfolio Dashboard[一括更新]The button will bring up a popup where you can paste up to 1,000 domain names. From here you can quickly change the landing page for the list of domain names you pasted.
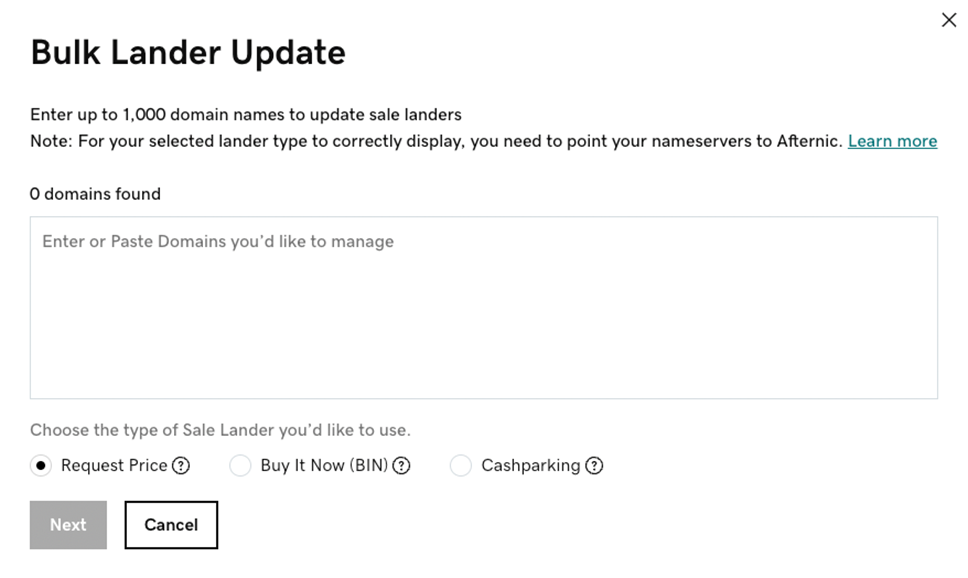
For sellers with sizable portfolios, this is a very efficient way to switch between Afternic landing pages. This is especially useful for testing specific landing pages for specific domain names in your portfolio.
why did you do this
Moving away from reliance on nameservers as a way to switch landing pages in Afternic is designed to improve the experience for merchants managing domain lists on Afternic.
This allows Afternic to continue adding more landing page options in the future without relying on additional nameserver settings.
Recommendations for adding new domains to Afternic
New domains pointing to Afternic nameservers will default to the request price landing page.
The recommended flow for adding domain names to Afternic is:
- Set the domain names to ns1.afternic.com and ns2.afternic.com.
- Add a domain name to your Afternic account
- By default, the domain name shows the request price landing page
- If you want to change the landing page you see, you can do so from your Afternic portfolio dashboard.
- Changes to Afternic landing page selection will now be performed from the Afternic portfolio dashboard.
Customers already using Afternic nameservers can use Afternic’s portfolio dashboard to update their landing page settings individually or in bulk.
Ownership Verification
Automatic ownership verification using nameservers and the TXT method replaces Afternic’s previous customer service-driven verification and provides a faster, independent way to remove outdated listings.
This is a big step forward for Afternic’s platform.
Add domain name
Attempting to add a domain name to a portfolio that is already listed on Afternic will undergo an ownership verification process.
Adding a domain name to Afternic is familiar to most sellers. Nevertheless, the entire workflow has been overhauled and incorporated into the Afternic 2.0 ecosystem, as you can see below.
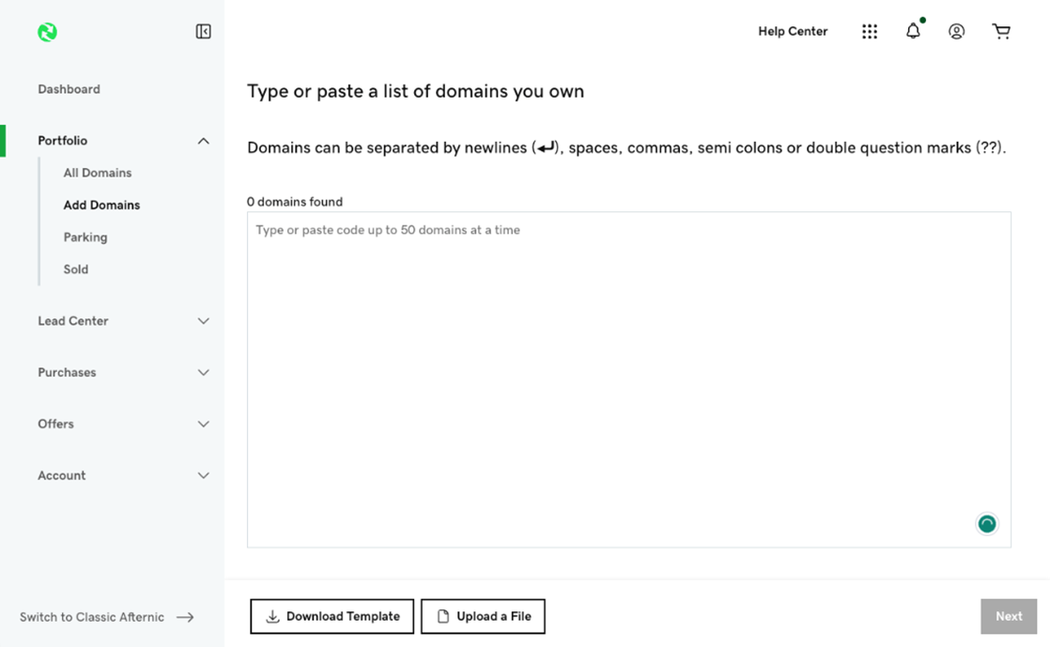
You can add up to 50 domain names on-screen at once. You also have the option to upload domain names in bulk.
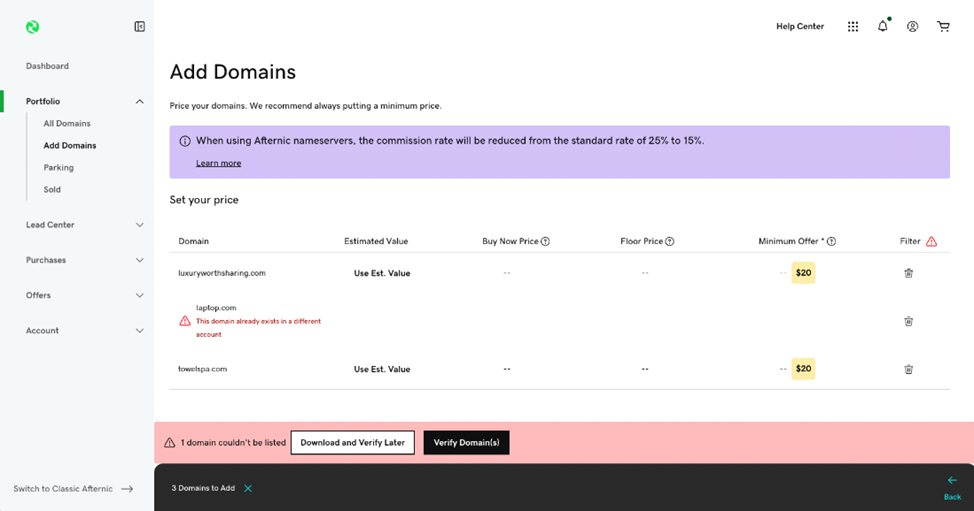
Once you start adding domain names to your Afternic account using the on-screen inputs, you will be presented with another revamped screen asking you to include the price of your domain name.
If the domain name you are trying to add to your account is already listed in Afternic, the system will warn you by prompting you to verify ownership.
How to use ownership verification
[ドメインの検証]Clicking the button will bring up a popup where you can choose between two domain name verification methods: TXT or nameservers (NS3).
Both options require a simple addition of your domain name to your records, which can be completed through your domain name registrar.

Select either the TXT or NS3 record and copy the given code to your screen.
After adding the code to your domain’s DNS settings through your domain registrar, first run the[はい]after clicking the checkbox[所有権の確認をリクエスト]You can proceed with the verification by clicking the button.

An on-screen pop-up notifies you that Afternic’s automated verification system is checking your domain’s records for a verification code.
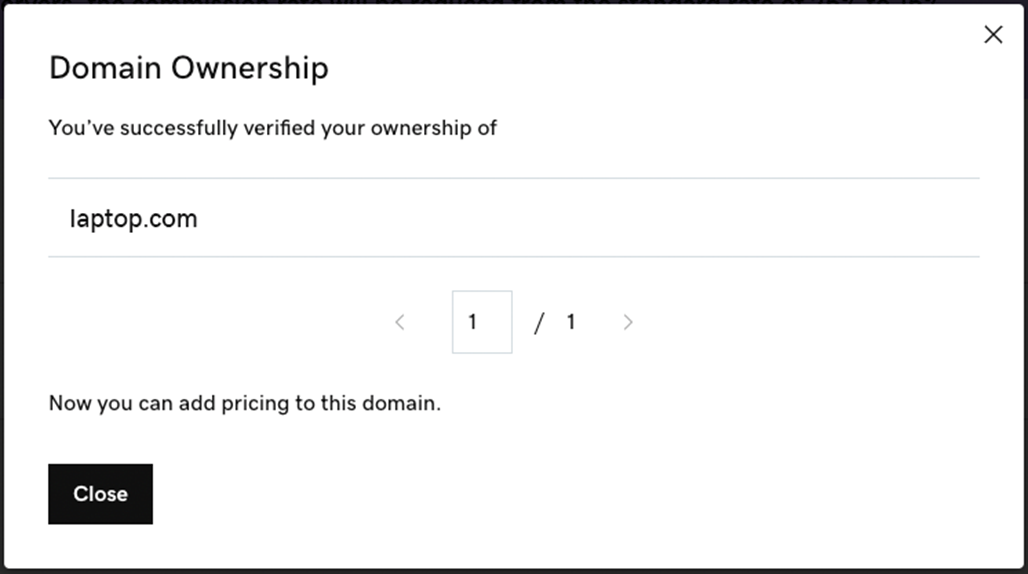
If your TXT and nameserver records are already set up, ownership verification may complete in less than a minute. If so, Afternic will confirm that ownership was successfully verified with an on-screen popup.
At this point, you can add a price to your domain name as usual.
5 tips for sellers
1. Bookmark your ownership verification record
Each Afternic account has its own verification code. You can easily find your unique TXT and NS3 codes by going to Afternic’s new ownership settings page. Bookmark this page in your browser for quick access.
2. Add DNS records in advance
Automatic ownership verification is fast, but relies on registrars to propagate DNS records. In some cases this can take up to 48 hours.
For even faster ownership verification, we recommend that sellers add a TXT or NS3 code to their domain name before adding it to their Afternic account.
This means that once you enter the “add domain” flow, you will go through the verification process more quickly.
3. Make sure you added a TXT or NS3 record
Before adding a domain name to your Afternic account, we recommend verifying that a TXT or NS3 record has been successfully added to your domain name.
This third-party tool can show you your current TXT records, but GoDaddy’s Whois lookup will show you your domain’s current nameserver configuration.
While checking these tools, make sure your NS3 or TXT records match those on the Ownership Settings page.
4. Toggle on/off to view domains that require action

If you have added multiple domain names to your account and some of them require ownership verification, you can click the warning symbol above to view only the domain names that require verification.
5. Download and finish later
If Afternic isn’t ready to verify your domain names, you can download a CSV list of unverified domains and do it later.
Sign in Afternic 2.0 Beta Account Start using Ownership Verification and Lander Selection today.