

Expensify is a cloud-based expense management application that tracks expenses and allows employees to submit them for expense reporting. It focuses on expense tracking and reporting with features such as individual tracking, expense policies and approvals. expense offers a free plan for individuals and paid plans for businesses starting at $20 per user.
expense
![]()
Strong Points
- Provides basic analytical tools for analyzing expenses, including graphs and filters
- Includes approval flow and expense policy
- Easy-to-understand interface
- Submitting Mileage Expenses
- Submit expenses based on billable hours
Cons
- No replacement for bookkeeping software
- No multiple approval workflows for lower tier pricing plans
- Limited SmartScans included for individuals to stay on the free plan
When to use Expensify
- Companies using popular accounting software: Expensify integrates with leading accounting software brands such as QuickBooks, Xero, Oracle and Sage.
- Expense-heavy companies: Expensify, a pre-accounting app, prepares expenses on the books. The direct deposit feature also speeds up refunds and reduces the amount of work for accounts payable (A/P) clerks to manually generate refund slips for refunds.
- Companies wanting a free corporate card: Expensify offers a bundle of Collect and Control plans that include the Expensify card. If your company is still in the process of getting a corporate card for its employees, Expensify is worth considering as you can get one for free.
- Automatic expense reporting: Expensify allows you to reimburse your expenses through direct deposit through automated clearinghouses (ACH). Simply set up a bank account within Expensify to automatically send refunds to employees who owe you money.
When to use alternatives
- Companies looking for bookkeeping software: Expensify is just a pre-accounting app. It focuses on expense tracking and reimbursement and does not offer basic accounting functionality.For complete accounting, we recommend QuickBooks Onlineour best small business accounting software.
- Freelancers and sole proprietors who need easy expense tracking: The biggest feature of Expensify is its collaboration features for recording expenses. If you’re a sole proprietor or freelancer, you’re both an expense submitter and approver, so you don’t need Expensify’s collaboration features.Or you can try fresh books Because it has easy expense tracking for freelancers.
- Companies looking for an affordable standalone expense tracker: zoho expenses We offer more affordable monthly plans than Expensify. Apart from that, Zoho Expense offers corporate card reconciliation and can be integrated with popular accounting software such as QuickBooks and Xero.
Determinant cost burden
Cost of alternative means
raise the price
Expensify offers two group pricing plans, one for individuals and one for groups. Each price group offers his two-tier pricing options according to user needs.
Function cost burden
Expensify’s core functionality is expense management. Nothing more, nothing less. We focus on expense recording, tracking, reporting, and reimbursement. If you maintain books and accounts for your business, Expensify can be integrated with your accounting software.
Expensify settings
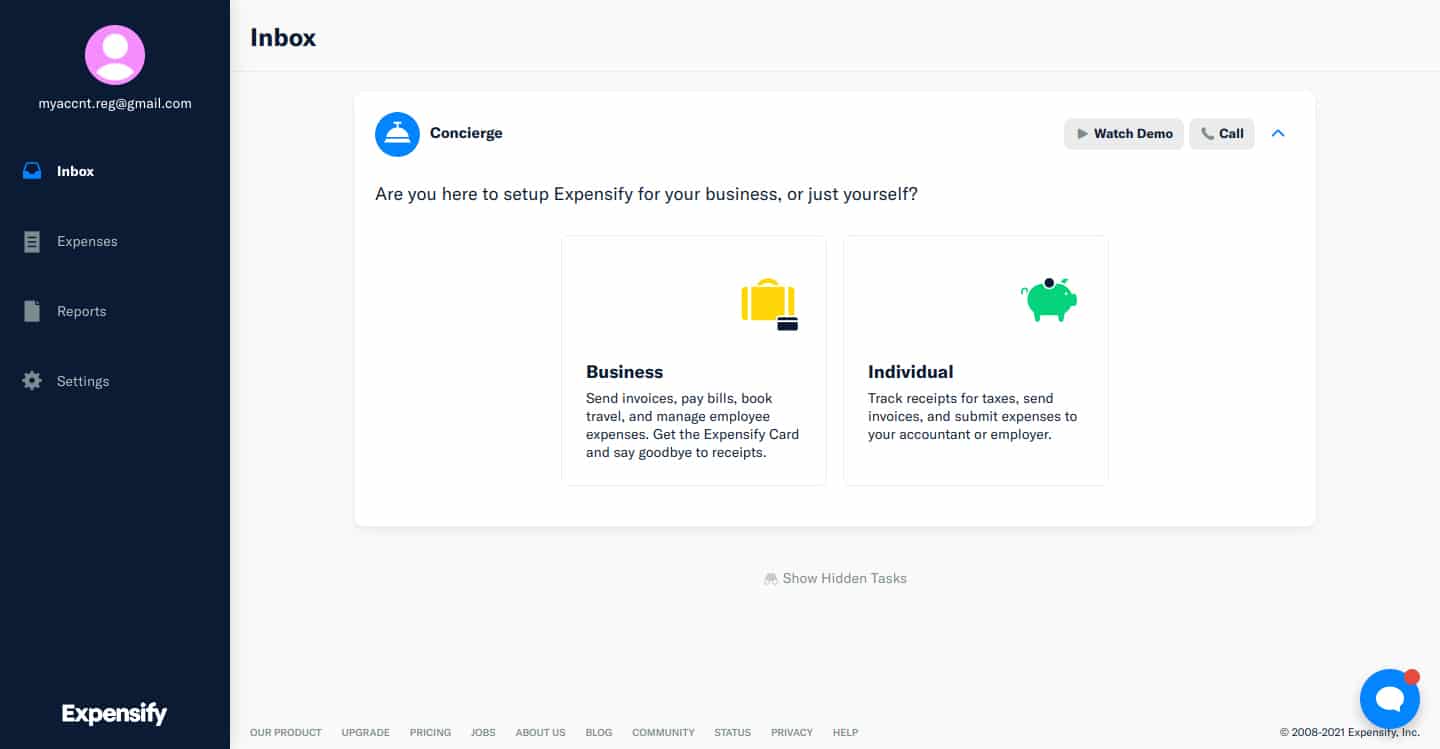
After logging in, the software will prompt you to set up your account. An Expensify concierge will guide you through using the app for the first time. Provides tips and instructions to familiarize yourself with its features. Anyway, you can always contact customer support by clicking the blue message bubble in the bottom right corner of the screen.
Expense policy settings
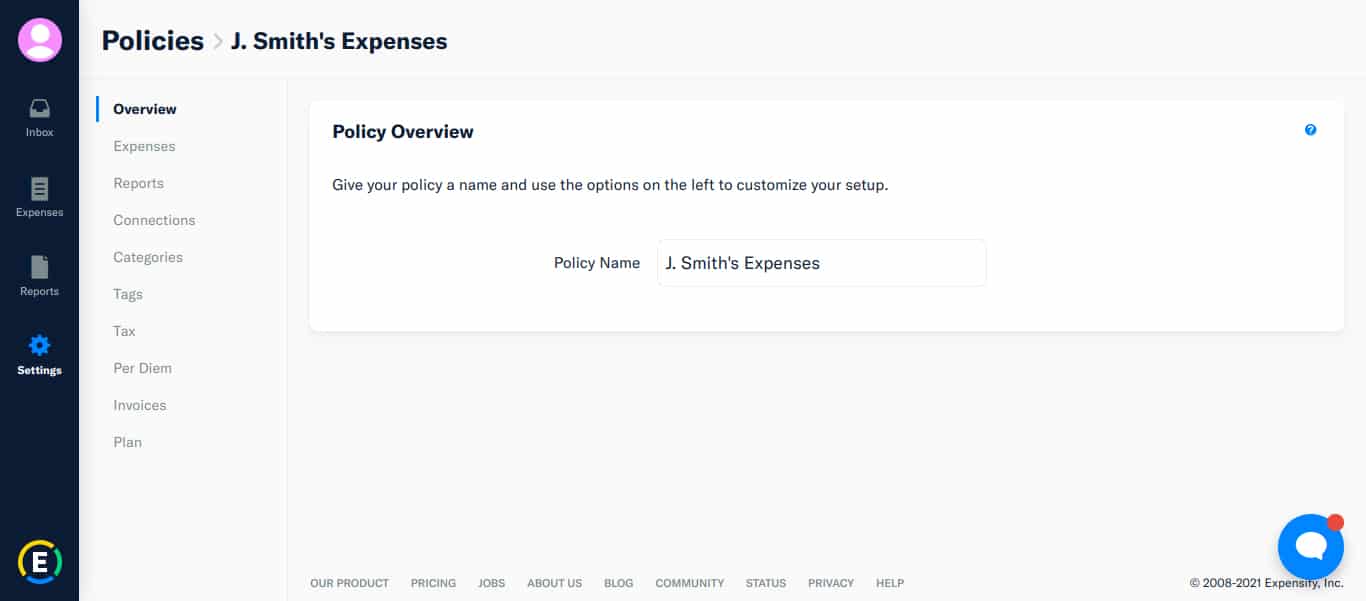
policy screen
Before you start using the app, we recommend setting up an expense policy. Expensify lets you set standard rates and quantities.
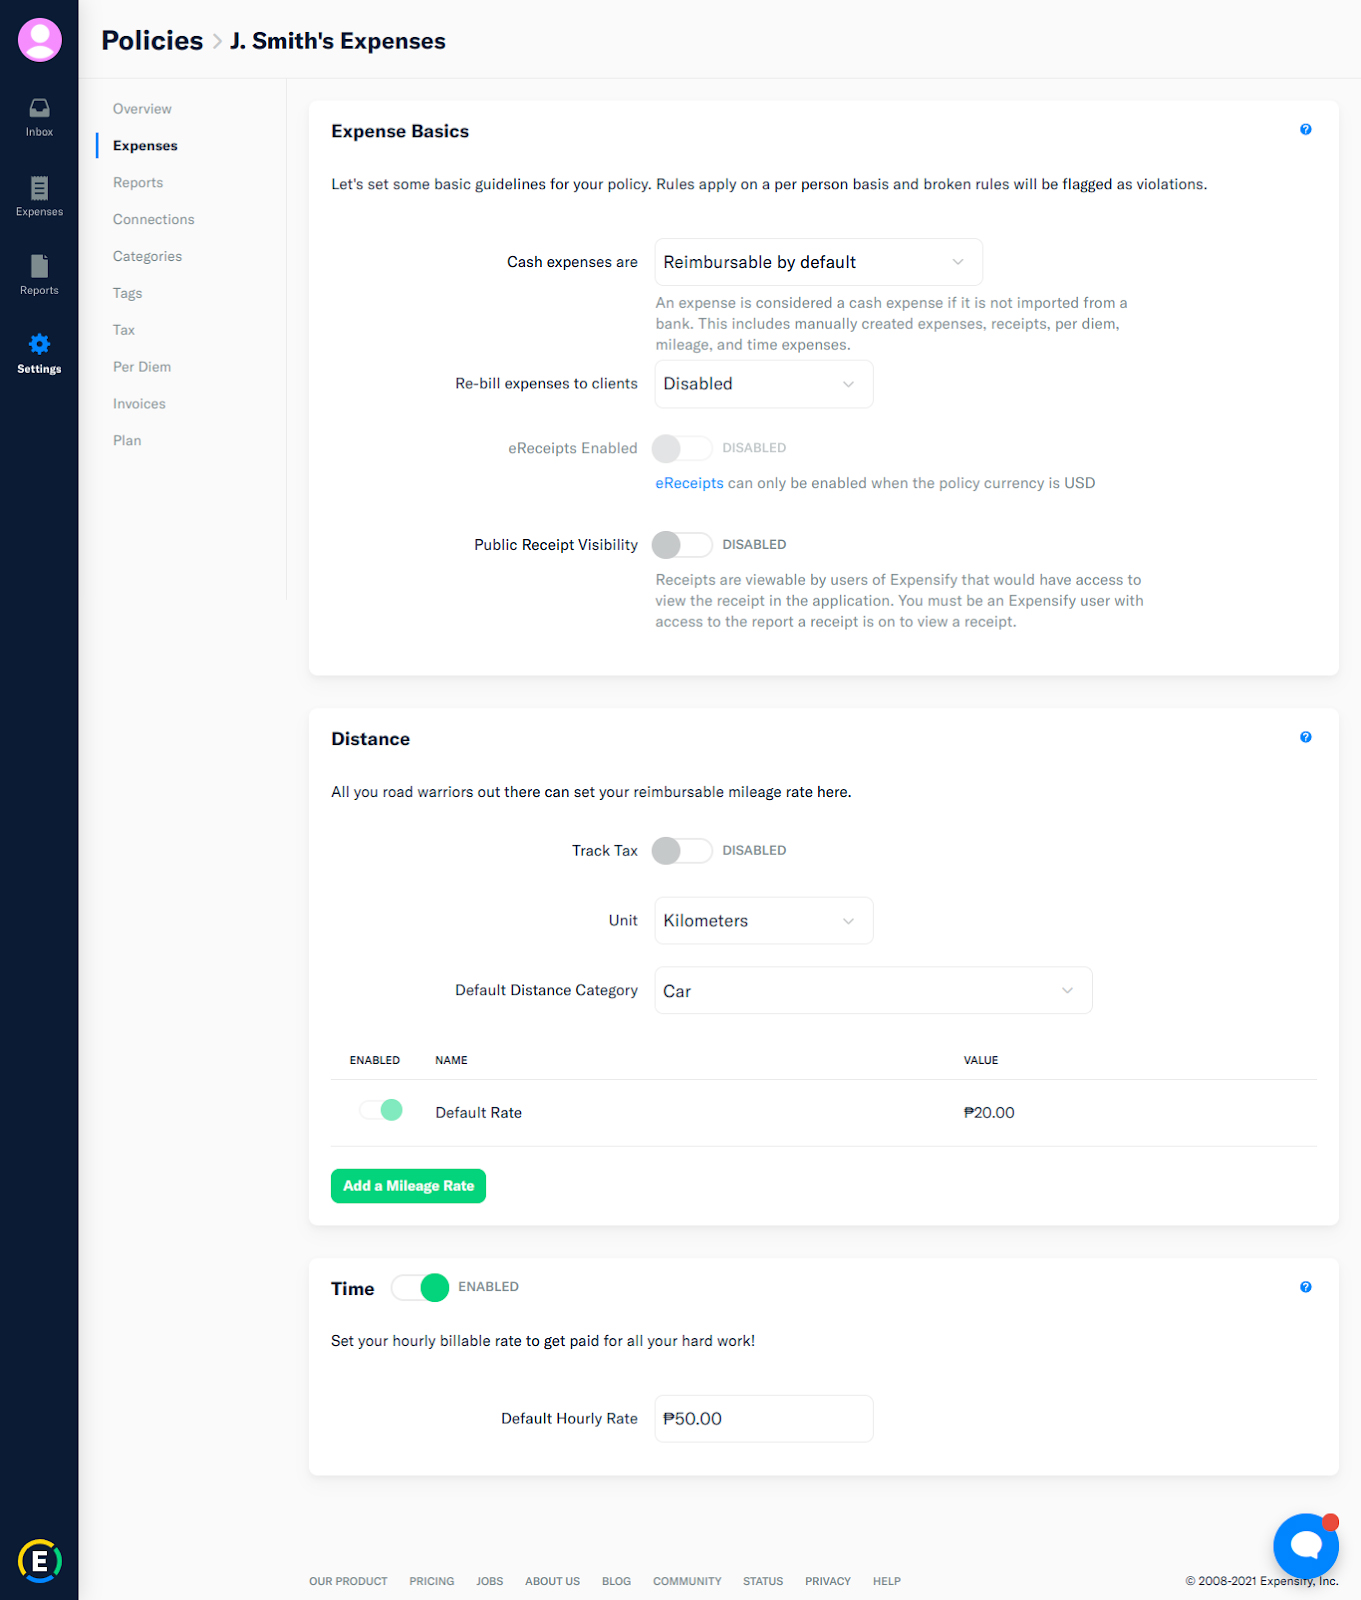
Expense policy settings
The Expense Policies screen tells Expensify how to handle transactions. You can set cash expenditures as refundable or non-refundable by default. You can enable mileage tax tracking, specify a unit of measure, and set mileage rates. Expensify has default rates, but you can add more rates if you want. In addition to mileage, you can also set billable hourly rates.
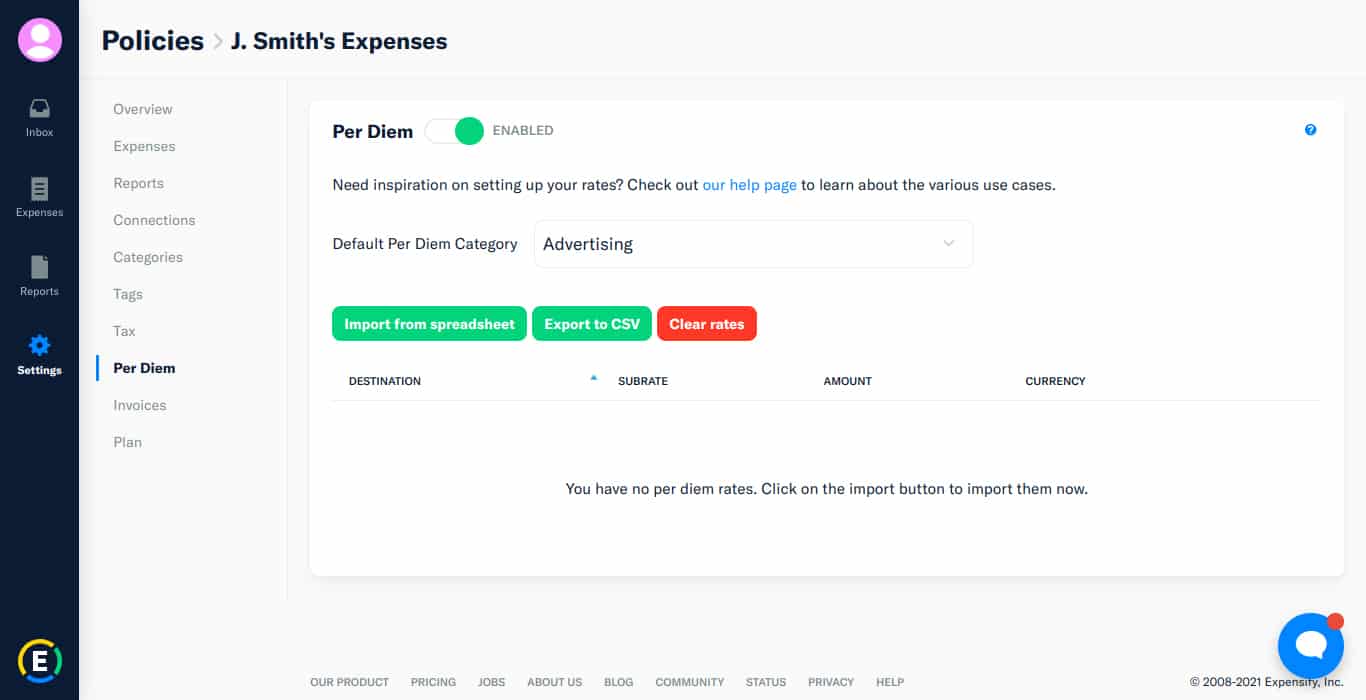
Setting the per diem policy
If your company allows employee per diems, Expensify can automate based on per diem percentages. Import rates from your spreadsheet and Expensify will apply them to future trades. You can also set a per diem to a default category for easy pooling of per diems.
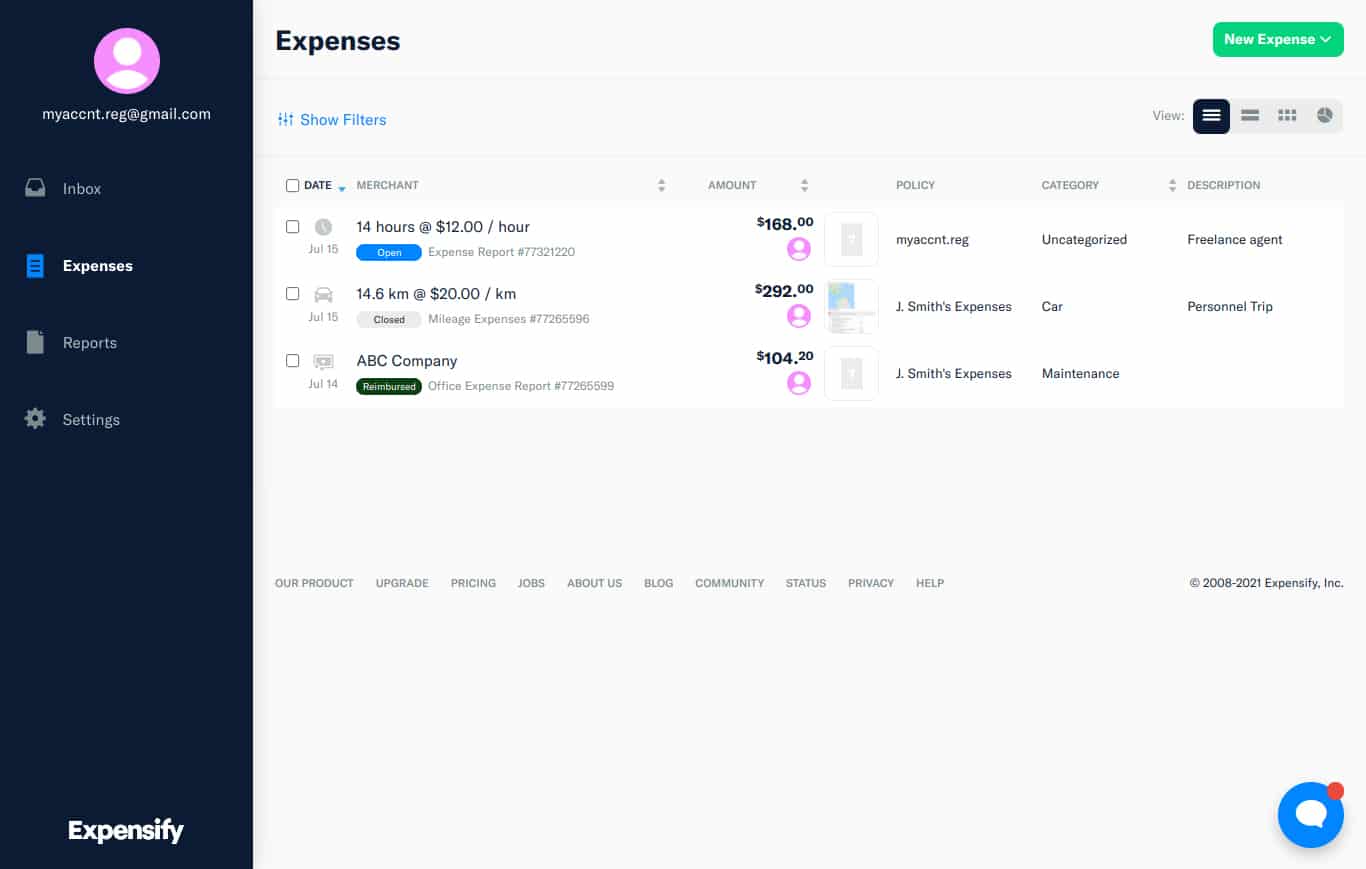
Encoding and reporting costs
in the left menu bar[経費]Click[経費]A tab appears. This will show all system-encoded costs. Each expense is marked according to its status.
- Unreported (white): The expense has not yet been added to any report
- Open (light blue): Expenses recorded and added to reports
- Processing (dark blue): Report submitted but not yet approved
- Approved (light green): Report approved but not yet reimbursed
- Closed (grey): Report approved but not refunded
- Refunded (dark green): Fees for approved reports have been reimbursed
Expense summary
There are two ways to encode expenses: manually or via SmartScan. If you need to enter multiple expenses, you can add multiple entries in one window as shown in the image below.
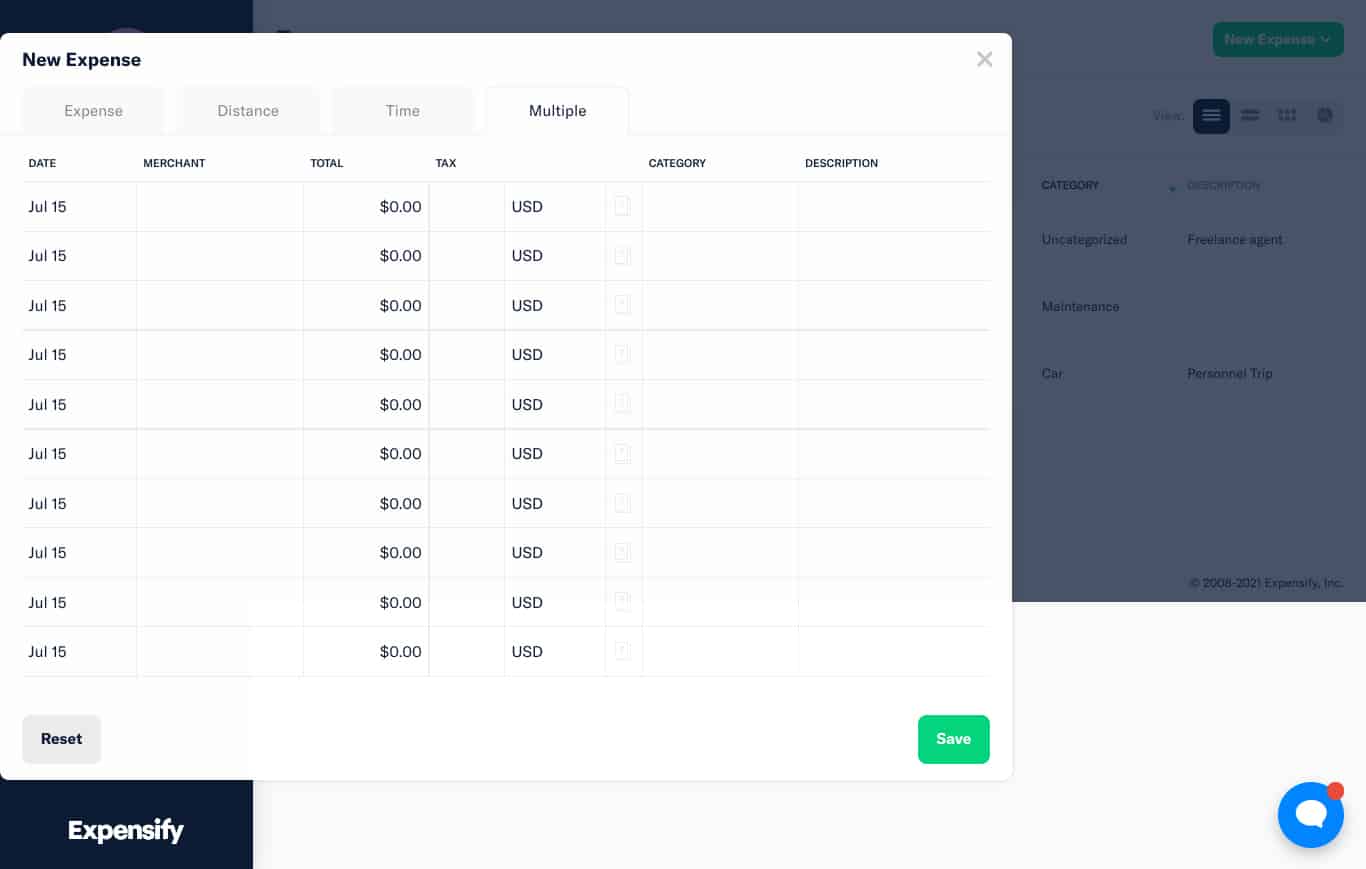
Encoding multiple expenses
When manually encoding an expense, you can enter the merchant, applicable tax, payment amount, expense category, attendees, and a brief description of the expense. You can also add a PDF copy of your receipt or an image of it.
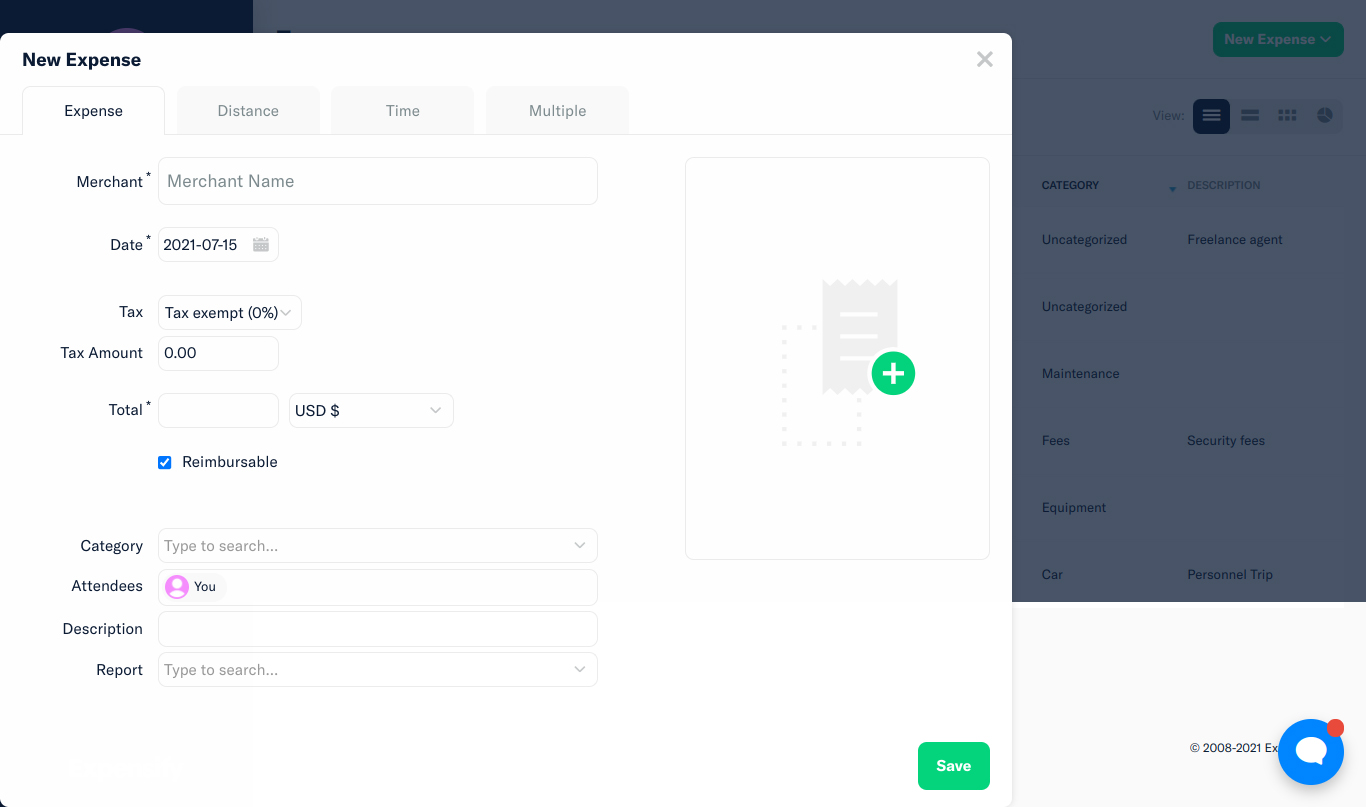
Enter expenses manually
View report
Once everything is laid out, you can add expenses to new or existing employee expense reports.[レポート]Simply click the dropdown menu next to the tab to see all reports. If you don’t have an existing report, Expensify can auto-generate one for you.[保存]Click to change the expense status to[オープン]will be
Submitting Mileage Expenses
Expensify allows you to record your mileage expenses in two ways. Enter your mileage manually or through the map. You can use your odometer to track your miles and enter them into Expensify. The app automatically calculates mileage costs based on mileage policies and applicable taxes. Alternatively, create a mileage expense via Maps, where you can enter your origin and destination and Expensify will automatically calculate the miles for you.

Enter mileage expense
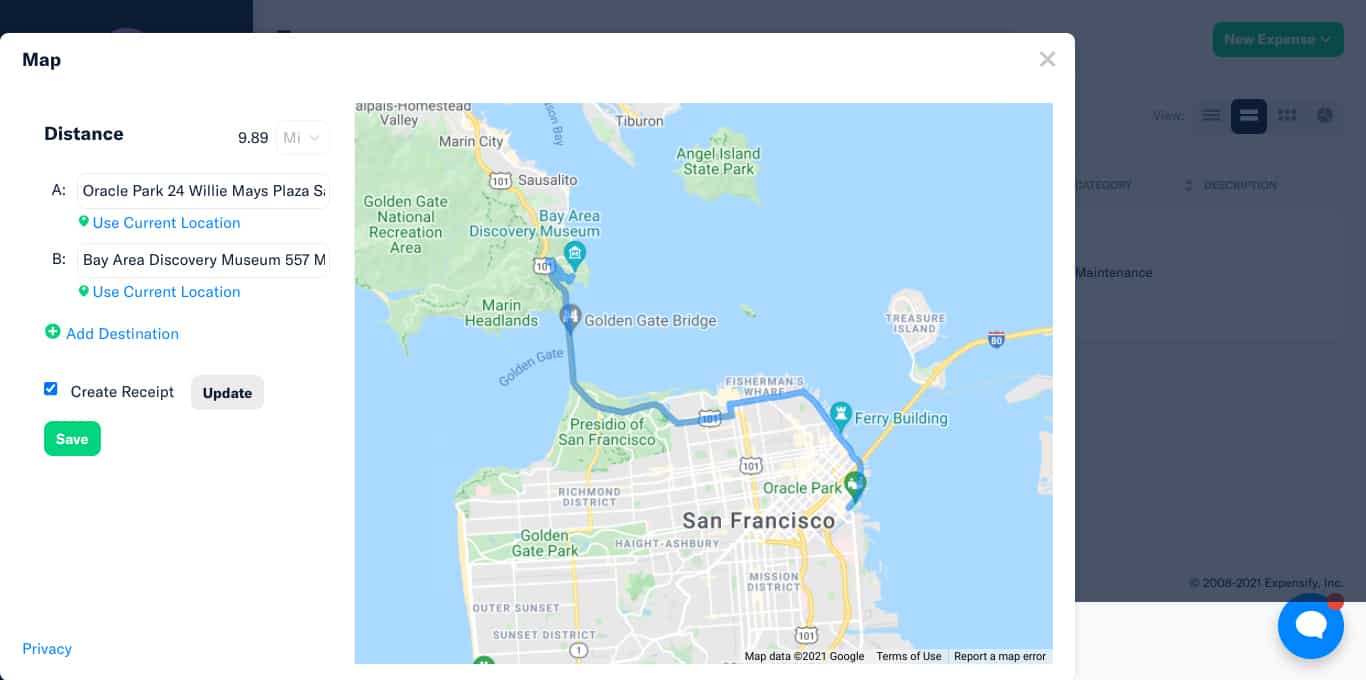
Enter mileage expenses using a map
Submit Expenses Based on Billable Hours
Expenses incurred based on billable hours are also accepted by the system. Simply add the number of hours billed and Expensify will do the rest.
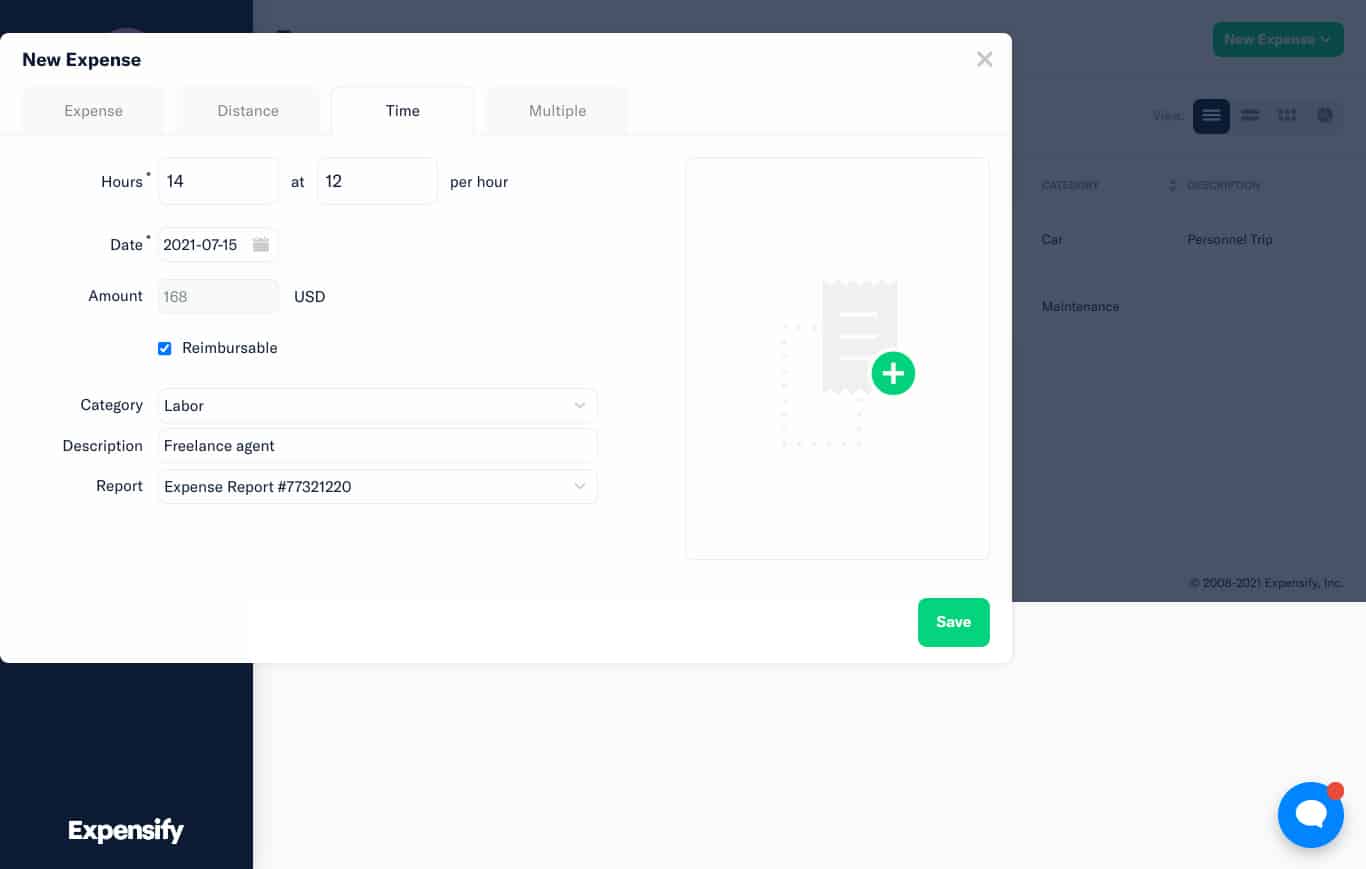
Entering Expenses Based on Billable Hours
Data visualization
If you want a quick snapshot of your expenses, the Expenses screen offers essential analytical tools like charts and graphs to visualize your transactions. You can also filter specific expenses based on status to assess the efficiency of expense approval.
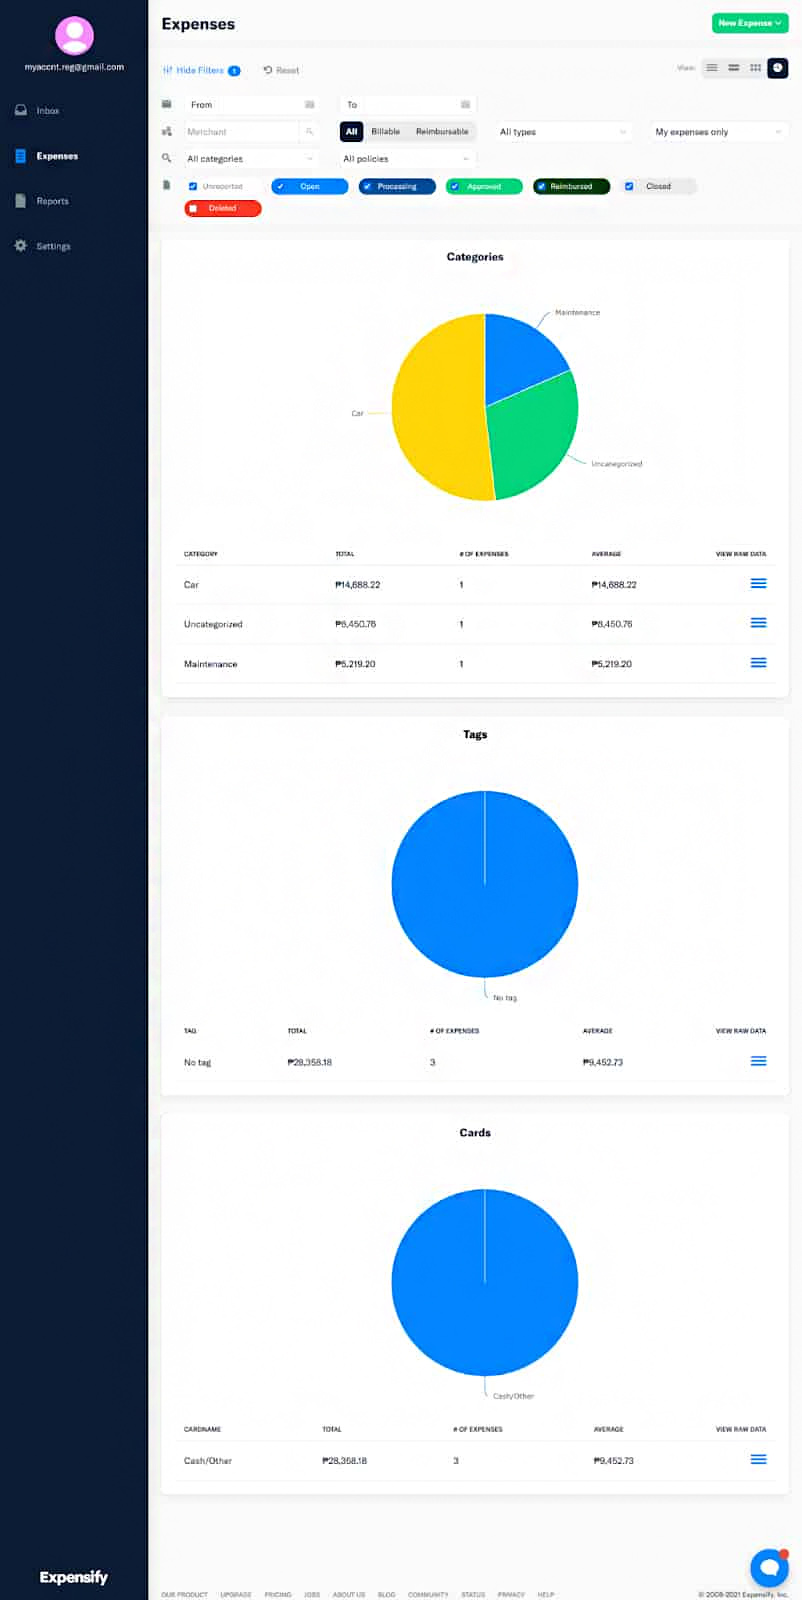
Expense Category Visualization
approval
All expenses are pooled into reports and submitted to approvers.[レポート]Click to see all reports. Approvers review the report and approve or reject some of the items listed. Only approved items proceed through the process.
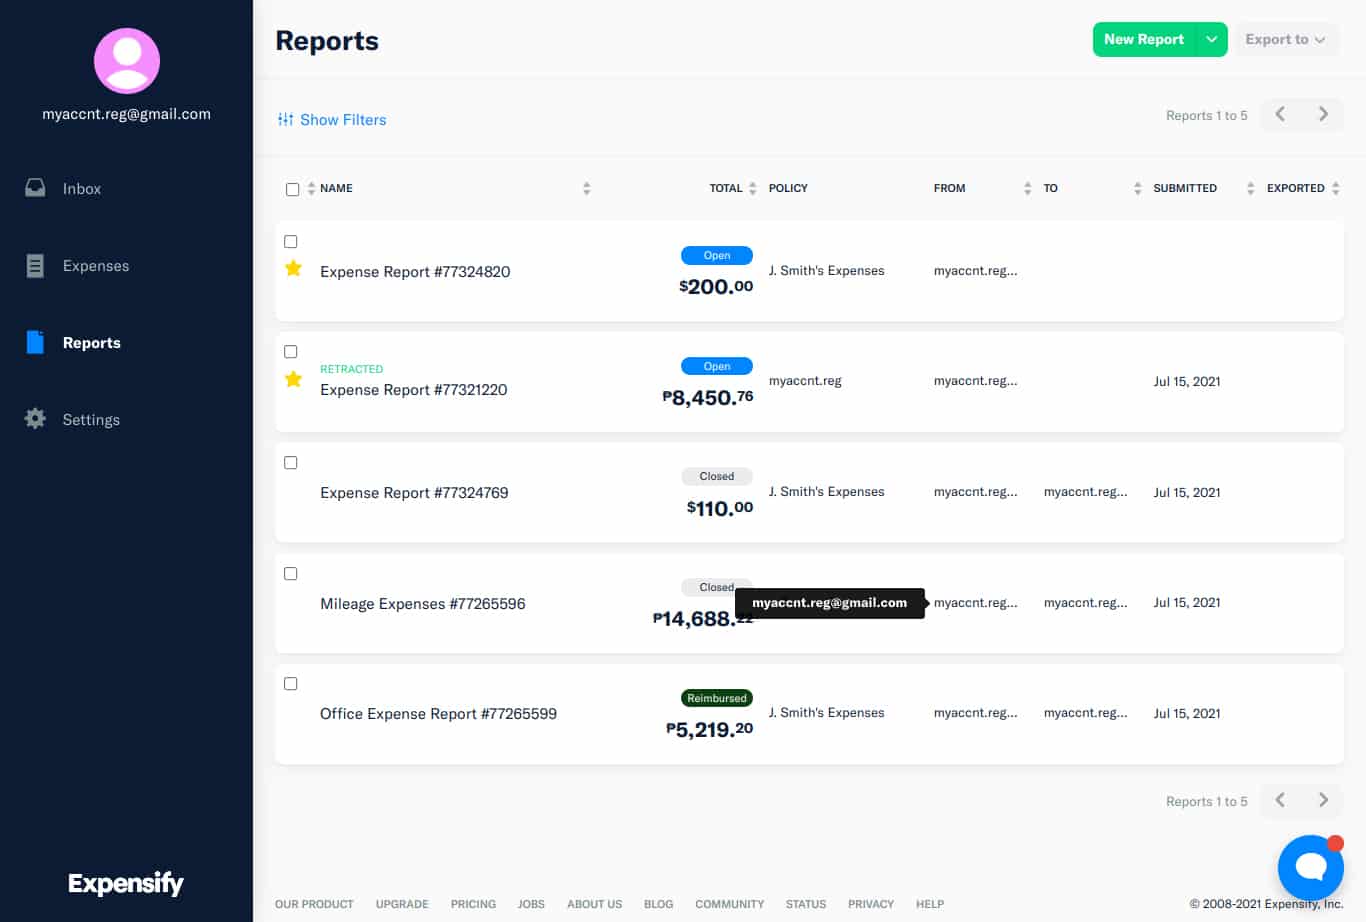
Report overview
If the approver rejects the report, the report is returned to the sender and marked as “withdrawn.” All expenses on the rejected report will be re-opened. However, after making the necessary changes, the sender can resubmit for approval.
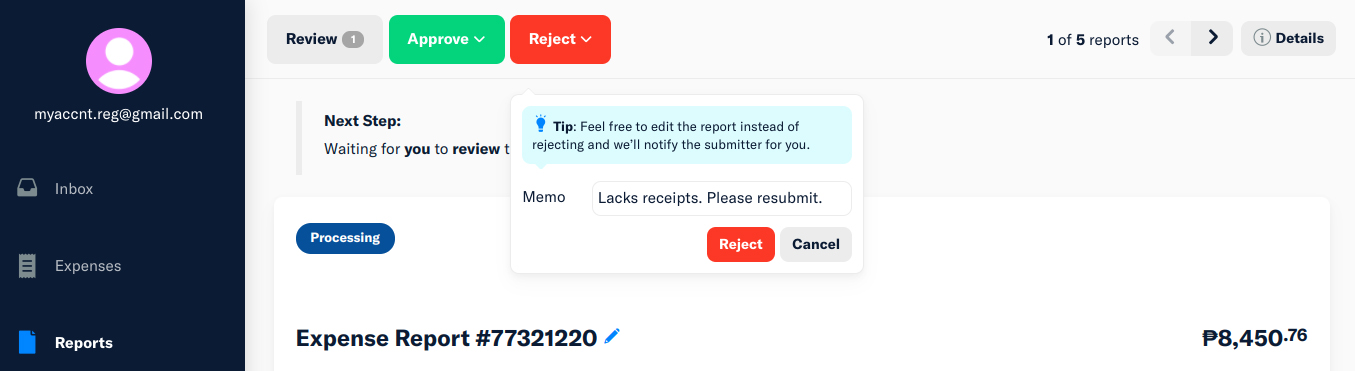
Rejection of report
refund
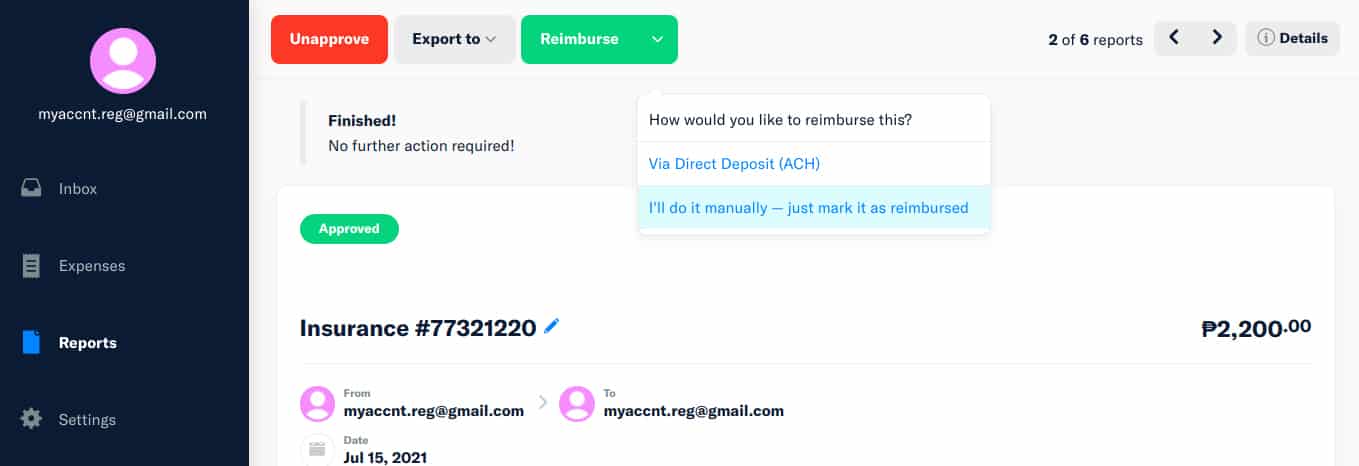
Refund method
After approval, the expense will be ready for reimbursement. The system allows direct deposits or manual withdrawals. Direct deposits require a bank account to be set up within Expensify and are reimbursed via Automated Clearing House (ACH). With manual refunds, you can physically transfer the cash, but Expensify will simply mark the report as refunded.
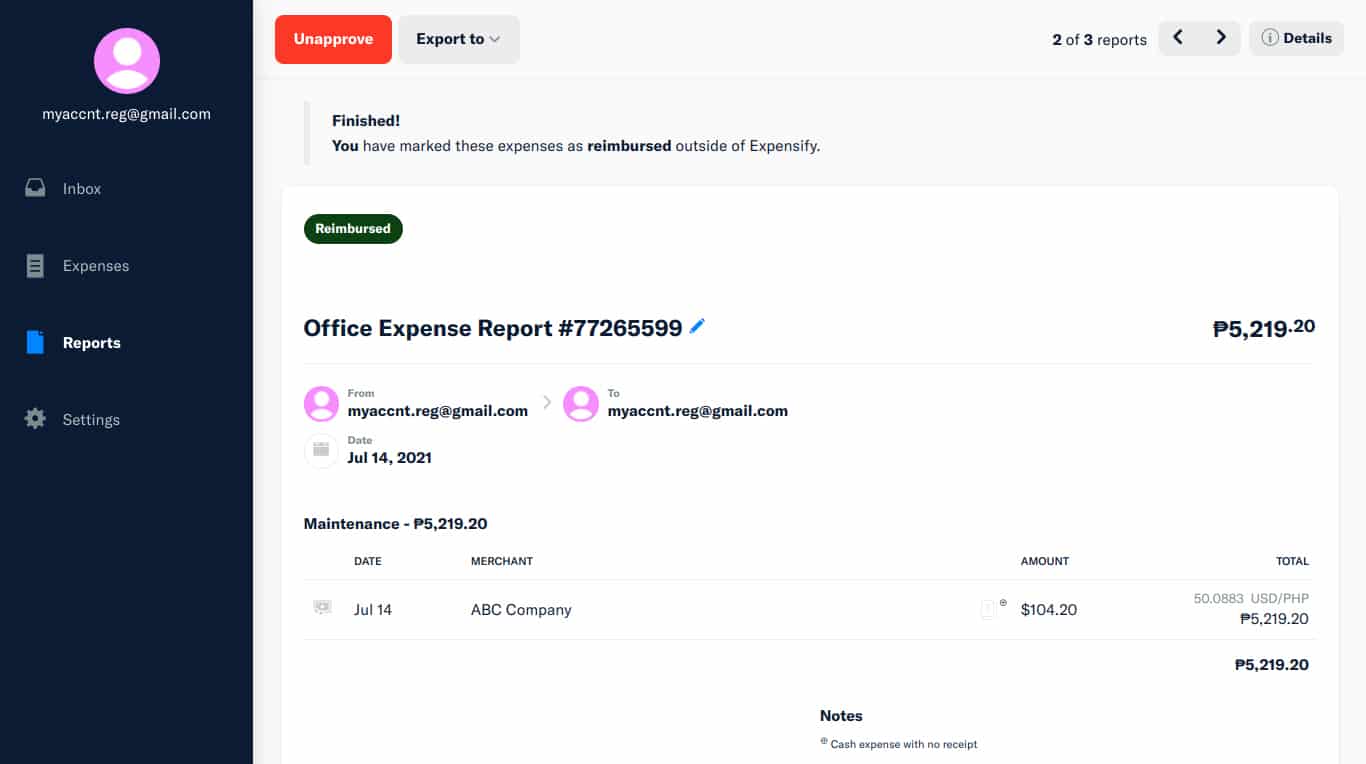
Approved and refunded reports
User review cost burden
Those who left Expensify reviews praised the platform’s clean interface and said its SmartScans reduced data entry time when recording expenses. I agree that the user interface (UI) design and overall user experience of the system is excellent. However, some users said they found it inefficient, such as not being able to upload their credit card statements. Duplicate receipt entries may also occur.
Overall, Expensify offers a competent expense tracking solution. Here’s how Expensify scored on user review sites:
- G2: 4.5 out of 5 based on nearly 3,700 reviews
- get the app: 4.4 out of 5 based on about 950 reviews
Frequently Asked Questions (FAQ)
How much is expensify?
Expensify is free for individuals. Business plans start at $5 per user per month when billed annually.
Is Expensify Worth Buying?
Expensify can be expensive compared to competitors, but users get free Expensify cards for their entire team. Expensify is worth it if your business wants to give every employee a corporate card.
Conclusion
whole, expense The ideal app for businesses that need to process and reimburse expense reports. Its features help accountants and bookkeepers speed up their bookkeeping process and correctly record expenses based on Expensify reports. In short, Expensify processed expenses provide bookkeepers with more accurate information than manually tracked expenses in a spreadsheet.
It is also recommended as an auxiliary application for accounting software. However, it is not a standalone bookkeeping program.